Is EIFS Tape Required?

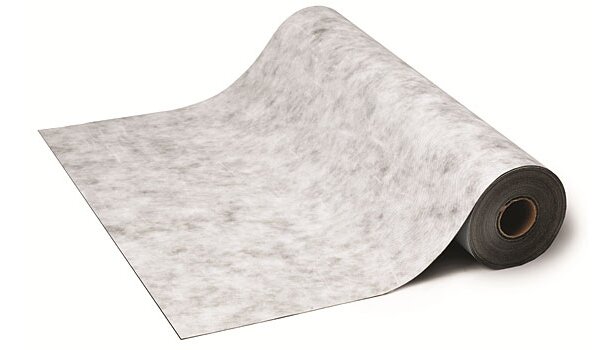
EIFS tape is a self-adhesive membrane that is made from a rubberized asphalt that has been laminated to a polyester fabric. The fabric helps to strengthen , providing a stronger, more crack-resistant bond  with most exterior coatings to provide a self-sealing, waterproofing layer. It is primarily used around windows and doors, taping panel seams and other penetrations. The membrane (or “tape”) is meant to be covered by EIFS, stucco or some other type of siding and trim material. The product is highly adhesive, gripping firmly to nearly all dry, clean surfaces including plywood, OSB, insulation boards, housewrap, masonry, concrete and een metallic products like aluminum siding. The tape is usually about 30mm thick and can be applied in temperatures ranging from  5 degrees to 45 degrees. There are a number of roll thicknesses available, ranging from 36″ to 96″ and usually 100 feet in length.

As part of a warranted EIFS installation, the EIFS tape is absolutely required by most reputable manufacturers. EIFS tape is a key part of water proofing the substrate behind your stucco, which can costs tens of thousands of dollars if done improperly.

Sadly, many contractors will cut this product out of their installation process if pushed too hard to cut down on price by the home owner. While a sales rep from an EIFS manufacturer will be able to tell it’s missing, most home owners can’t identify one component of an EIFS installation from another. That leads to many contractors cutting out required components simply to make some money. Skipping the EIFS tape won’t make any noticeable difference aesthetically, leading home owners to believe they’re new siding was properly installed. Given a minor leak and a lack of EIFS tape however, and moisture begins to get into the wall cavity, become trapped and cause potentially thousands of dollars of damage in mould and rot.

Do It Yourself EIFS Installation

As a precursor to this article I’ll say this: While it may seem like a good, money saving idea to install the EIFS yourself, it’s very technical work that even the skilled tradesmen run into problems with at times, so don’t do it yourself. Paying a professional contractor to install it will always prove to be less expensive in the long run, and they can do it much quicker than you.

There are people who want to do it regardless, on a detached garage or a dog house. The amount of time it takes you to install EIFS can be 2-3 times as long as a skilled contractor, so count on paying yourself less than than $10/hour in terms of cost savings. The damage that you can do is minimal on a garage or pet house so here’s a guide.

First

Get familiar with the manufacturer’s system that you’d like to use and their installation guidelines. We recommend DuROCK, located in Vaughan with a long standing history of solid materials and cutting edge innovations that make installation simple. While an installation guideline can’t teach you how to float the finish coat or how to determine what 1/8th inch of base coat looks like, it can tell you what specifications to aim for. Following manufacturer guidelines will ensure that your new EIFS cladding lasts as long as possible. Read through it, make sure you understand it, and bring your questions to the order desk at the manufacturer.

Material Estimates

First you’ll need to know the Area (square footage) that you need done. Measure the width and the height of the walls to get the area, and add 10% to account for waste. Don’t remove regular sized windows and doors from this total. Coverage for materials varies depending on thickness but some guidelines for our example are as follows:

  • DuRock Polar Coat (air barrier): Area / 110 square feet per pail = X pails
  • PUCCS Insulation: Area / 240 square feet per bundle = X bundles of styrofoam (comes in packs of Y 2’x4′ boards)
  • Fiberglass Mesh: Area / 400 square feet per roll = X rolls of fiberglass mesh
  • Polar Bear (base coat): Area / 120 square feet per pail = X pails
  • Finish Coat: Area / 200 square feet per pail = X pails

For obvious reasons, you won’t be getting the contractor discount on materials. Expect to budget $4.00-$4.50 per square foot for materials.

Warranty

Manufacturers spend a lot of time and money training new contractors and following up on their first few jobs. Over the course of months or years and dozens of projects, they develop a relationship that allows them to warranty a project. Doing the stucco yourself means that the manufacturer has no idea who you are or what kind of job you’re going to do, and likely will not warranty the project. That means that you’re going to want to follow their specifications as closely as possible.

You also want to contact your home insurance company to notify them that you will be undertaking a home improvement project. Your home owners insurance will really be your only protection, and there may be exemptions under your coverage for work you performed yourself. Finally – performing the work yourself leaves you completely liable should you sell your house and anything happens.

Why Do It Yourself?

There are a number of reasons people do their own EIFS home renovations. On smaller, detached buildings (a shed or poolhouse) it might make for a fun summer project, but it will not save you money. You can count on spending 2x-3x as long completing the project as a professional contractor would, and risk missing some vital part of the installation. You take the burden of a warranty and insurance onto your own shoulders, and likely will not have the same level of finish quality at the end.

Air Barrier Considerations for the Canadian Market

Buildings need to be designed to withstand the unique environmental conditions they are being built in – and practices that work in one location might not necessarily work in another. Find out what makes the air barriers in EIFS so unique and some general information on specifying one for your project in this great article: http://www.kenilworth.com/publications/cc/de/201205/files/18.html

For more specific details relating to your project, contact the experts over at DuROCK.

Increase EIFS Durability with High Impact Mesh

Insulating your home with EIFS is a huge investment in not only the comfort of your home, but the value of it. The comfort of not having drafty rooms that you or your children have to sleep in can’t be measured in dollars. In measurable terms of value however, the insulation that is added reduces heating and cooling bills – money that is never recovered once spent, and the aesthetics can have a large impact on resale value. Like all investments, you want to make sure that it’s insured against accidental damage.

While there aren’t any official insurance policies that will cover dents and holes in EIFS, there are investments you can make to increase it’s durability. The least expensive investment with the most return-on-investment is adding a layer of high impact mesh to the project.

There are varying grades of fiberglass mesh that can be used on your home, measured by weight per square yard. Heavier weight mesh (11 oz and 15 oz) will be more impact resistant than lower weight mesh (5 oz).

EIFS normally incorporates a layer of (5 oz) mesh, applied over top of the insulation and embedded in the cementitious coating. While this mandatory protective layer will protect against normal impact, things like screwdrivers, baseball bats or wheelbarrows can still break through the finish coat, base coat and mesh and leave torn mesh and exposed styrofoam. EIFS manufacturers therefore recommend a heavier mesh (11 oz or 15 oz) in areas that might need additional impact resistance – typically around doors, driveways, walkways or where children might play.

Durock PUCCS Mesh Specs

The high impact mesh is more expensive than standard mesh because there is extra material – it is a higher quality than regular mesh. The two ways of adding high impact mesh are:

  1. Replace the layer of standard mesh with a heavier duty mesh during installation; or
  2. Add another layer of high impact mesh embedded in base coat on top of the first layer of standard mesh

Your contractor will usually have a preferred method of doing high impact mesh, though the choice of how resilient your walls should be will ultimately be yours in the end. If adding another layer of high impact mesh instead of substituting, a day will need to be added to the installation time (24 hours is required for each layer of base coat to dry before installing the next layer).

The Figures

So why invest in high impact mesh? To prevent having to repair a wall. It’s expensive. EIFS can be patched, but because a finish coat changes over time, the patch will never look like the original installation of the wall. Patches will cost $500-$750 to have a contractor come out and perform. The only way to get around patching is to re-coat the wall from corner-to-corner (or between control joints – you did specify control joints right?). Re-coating can cost anywhere from $1000-$3000 depending on how much wall surface needs to be done.

Adding high impact mesh on the other hand, requires a little up front investment but pays for itself the very first time it prevents any damage. Adding it in a few key places (doors, driveways, walkways) will cost $300-$600 on average – a small price to pay for a lifetime of insurance.


Questions and Answers

Q: Does a home with high impact mesh look any different than one without?
A: No, the additional layer of mesh and base coat do not change the overall appearance of the house. Once completed, there is no visual difference between a house with high impact mesh and one without

Q: Can high impact mesh be used as a selling feature on an EIFS home?
A: Absolutely. Buyers will feel more comfortable purchasing a home that has additional protection against accidental damage. Make sure to get written specifications and DuROCK material receipts from your contractor as proof, as well as a photo during installation if possible.


See also: Corner With High Traffic Lacking High Impact Mesh and Column Lacking Heavy Duty Mesh.
3 Background Checks to Perform On Your Stucco Contractor

Having your home retrofitted with stucco is more than just a physical change to an inanimate object, it’s trusting another human being to fulfill their end of an agreement and keep your best interests at heart when modifying your largest asset. The contractor will in all likelihood be at your house even when you’re not around until the project is completed, so trusting them to be respectful of your property and privacy is a must. That’s why you need to trust your gut when hiring a contractor, as much as you need to do your due diligence. At the very least, you should be checking in with previously completed projects, the manufacturer who supplies their materials and their business history.

Character Reference

Get the name of one or two previous customers you can call. Ask about how well the contractor did his job – but also how attentive he was to their specific needs and requests. Did they avoid working in the evenings when their kids were home from school? Was scrap material and junk left on their property after the job was completed or was it cleaned? Were the workers loud, vulgar and abrasive or cooperative? Did they actually show up when they said they would or were they frequently absent?

Manufacturer Reference

Call the manufacturer whose material they specified on your home. Does the manufacturer know about them? Is it a good thing the manufacturer knows about them? It’s not uncommon for contractors to be behind on their payments to their supplier, and knowing about about money that is potentially owed by the contractor can help you avoid problems near the end of the project. Make sure that the manufacturer backs the contractor and whether any special conditions need to be met to get your warranty.

Don’t forget to do some background research on the manufacturer themselves, since not all of them are equal in terms of price and quality. Reputable manufacturers such as DuROCK are listed on the EIFSCouncil’s Manufacturer List and ensures that they follow the industry’s quality guidelines.

Business References

Ask for their Business Liability Insurance and a Business Number. These are the basics of what is required to operate a contracting business, and larger contractors are required to have Fall Safety Training for each employee as well as Workers’ Compensation on commercial projects. The Business Number shows that they are in fact a registered business and the Business Liability Insurance can protect your home or your neighbours if any damage is caused through the contractor’s own fault.

Conclusion

While there is no step-by-step guideline that can cover every possible event that can happen during a home renovation, following the previous suggestions can help reduce the chances of something going wrong because of a contractor who talks a good game but can’t follow through. Knowing that the contractor has previous clients who are happy, is fully licensed and is in good standing with their supplier goes a long way towards helping you sleep at night. Follow your instincts while performing the background checks and don’t be afraid to ask questions.

  • What is Stucco?

    "Stucco" is typically what people in the Toronto area use when they're looking for EIFS (Exterior Insulation Finish Systems, or "synthetic stucco"). We use the two terms interchangeably.

    get a stucco quote
  • Follow Us Socially


    Blog
  • Toronto Stucco (Twitter)

  • Stucco Trim